If you're making a video chat or audio chat app, you can give your users a much better experience by using iOS CallKit. By the end of this Swift tutorial you'll learn how to make it so that when a user tries to start a video chat or audio chat with a friend, the native iOS Call Screen will show up. You'll even learn how to customize the ringtone, add your logo to the call UI, and modify a couple other features. Here's what you'll be able to make your app do with a few lines of code. If you'd rather make your app using JavaScript instead of Swift, check out our iOS CallKit/Android ConnectionService plugin for Cordova.
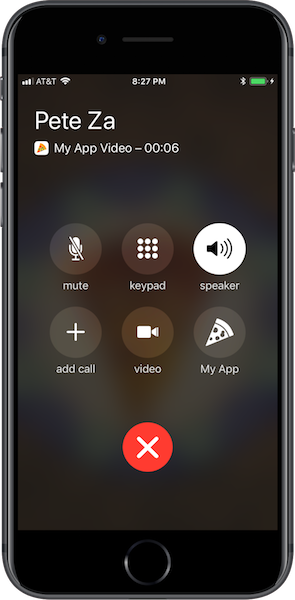
When one of your users sends a video chat or audio chat request to a friend, you can make this screen show up. You can download all of the code used in this tutorial with git clone https://github.com/WebsiteBeaver/callkit-tutorial.git
Note that you need a device to test out CallKit. CallKit won't work on your simulator. Also CallKit only works on iOS 10 and above.
Start by creating an Xcode Project and select Single View App

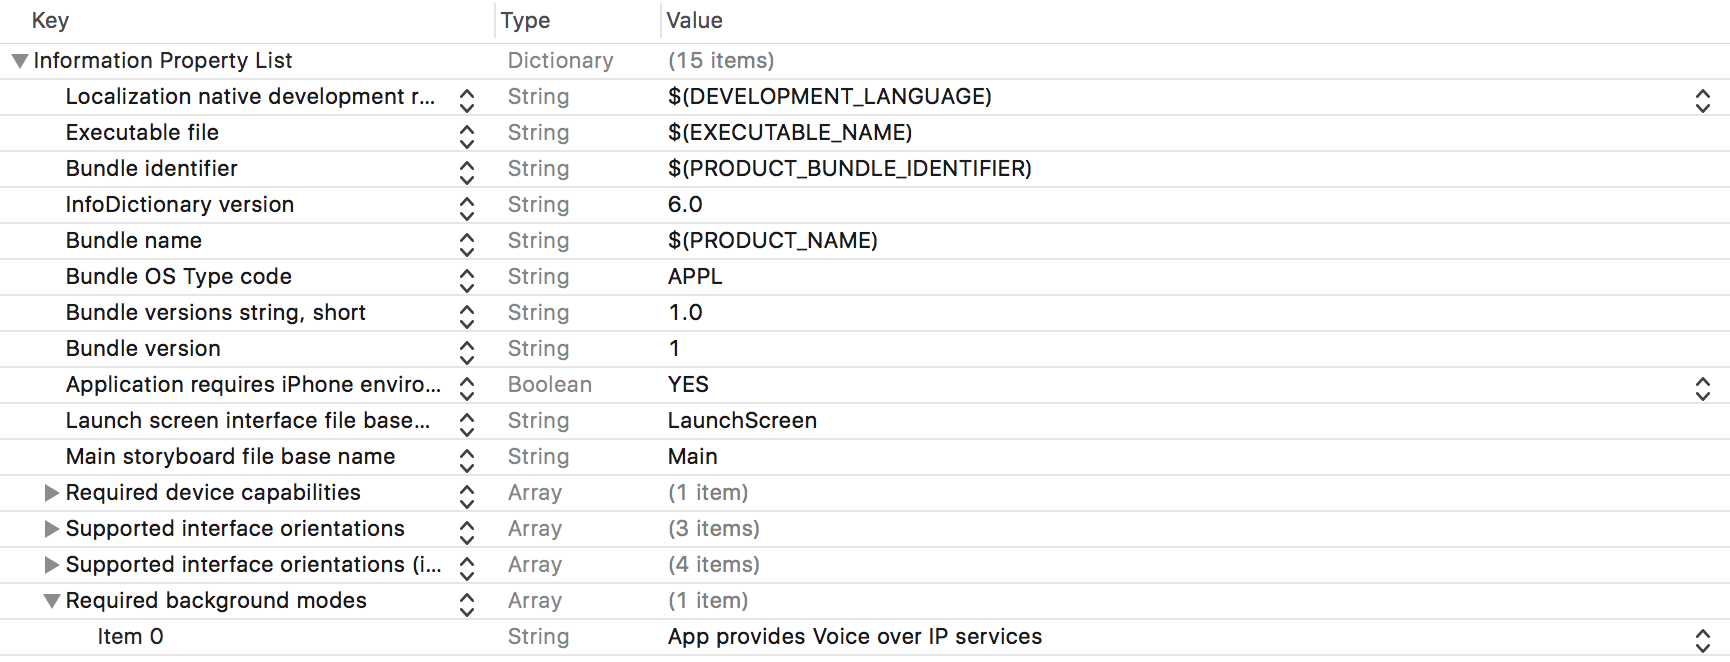
Name it whatever you like. This next step is very important, since CallKit won't work without it. You'll get an error that says The operation couldn’t be completed. (com.apple.CallKit.error.requesttransaction error 1.). Open up Info.plist and add Required background modes with type Array and value App provides Voice over IP services.
Open ViewController.swift and replace that code with:
import UIKit
import CallKit

class ViewController: UIViewController, CXProviderDelegate {

    override func viewDidLoad() {
        let provider = CXProvider(configuration: CXProviderConfiguration(localizedName: "My App"))
        provider.setDelegate(self, queue: nil)
        let update = CXCallUpdate()
        update.remoteHandle = CXHandle(type: .generic, value: "Pete Za")
        provider.reportNewIncomingCall(with: UUID(), update: update, completion: { error in })
    }

    func providerDidReset(_ provider: CXProvider) {
    }

    func provider(_ provider: CXProvider, perform action: CXAnswerCallAction) {
        action.fulfill()
    }

    func provider(_ provider: CXProvider, perform action: CXEndCallAction) {
        action.fulfill()
    }

}
Plugin your iPhone and press run. You'll see the incoming call screen as soon as the app loads. That's all there is to it. Can't believe CallKit is that easy? Let's go over some important details from this short piece of code.
import CallKit in order to take advantage of this awesome frameworkCXProviderDelegate is the delegate that allows you to use CallKit. The delegate is set using setDelegate.CXProvider as a global variable, which makes sense because you'll need to access it several times in your code. In this case we're just making it local to simplify the code.CXHandle. It's important to note that this should be unique. No two users should have the same handle.UUID. When you call UUID() it creates a random id that represents a call. No two calls should have the same UUID. You can store this in a database and use it later on in your code if you want, but it's not necessary.reportNewIncomingCall is what actually displays in the incoming call screen.providerDidReset is required because of CXProviderDelegatefunc provider(_ provider: CXProvider, perform action: CXEndCallAction) gets called. If you accept the call func provider(_ provider: CXProvider, perform action: CXAnswerCallAction) gets called. At this point you can start the video or audio chat.Go ahead and replace the code in ViewController.swift with
import UIKit
import CallKit

class ViewController: UIViewController, CXProviderDelegate {

    override func viewDidLoad() {
        let provider = CXProvider(configuration: CXProviderConfiguration(localizedName: "My App"))
        provider.setDelegate(self, queue: nil)
        let controller = CXCallController()
        let transaction = CXTransaction(action: CXStartCallAction(call: UUID(), handle: CXHandle(type: .generic, value: "Pete Za")))
        controller.request(transaction, completion: { error in })
    }

    func providerDidReset(_ provider: CXProvider) {
    }

}
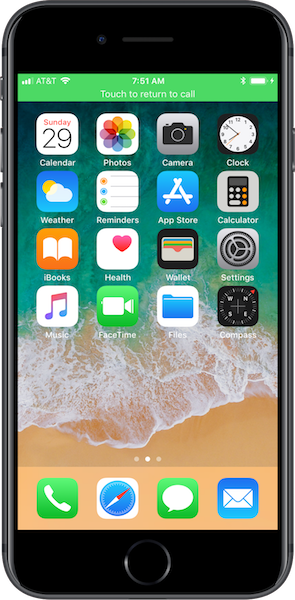
Run this code and press the home button on your iPhone. You'll notice the green bar at the top which indicates that you're in or trying to connect to a call. If you press the lock button on your phone, you'll see that the outgoing call is trying to connect. However you actually need to tell the app when the call is connected. If you're using WebRTC for a video chat, you can tell CallKit that the call is connected once both friends can see each other in the video chat. The next example explains how to connect a call, which you need to do after you make a call.
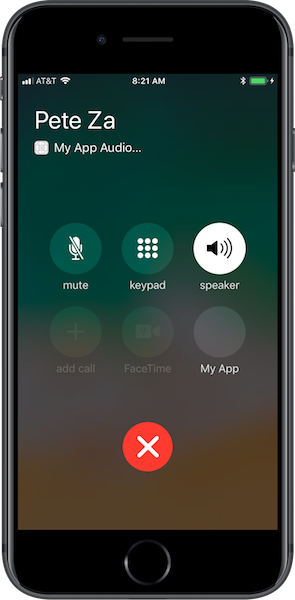
You only need to connect a call if you send a call. If you receive a call, the call gets connected as soon as soon as you press accept. Once the call is connected, a timer will display on the call UI letting you know how long the call is lasting for. In the receive call example, the timer starts as soon as you press accept because that's when the call is connected. In the send call example, the timer does not start until you let it know when to start. You should do this as soon as both friends can talk and/or see each other. In this example, we'll pretend that it takes exactly 5 seconds for the friends to connect. You can easily use WebRTC to let CallKit know when the call is connected.
Replace the code in ViewController.swift with the following, and then press run. Once the app starts you should press the power button. Notice how the timer hasn't started yet? That's because the call is not connected. Wait 5 seconds and you'll see the timer start which means that the call is connected.
import UIKit
import CallKit

class ViewController: UIViewController, CXProviderDelegate {

    override func viewDidLoad() {
        let provider = CXProvider(configuration: CXProviderConfiguration(localizedName: "My App"))
        provider.setDelegate(self, queue: nil)
        let controller = CXCallController()
        let transaction = CXTransaction(action: CXStartCallAction(call: UUID(), handle: CXHandle(type: .generic, value: "Pete Za")))
        controller.request(transaction, completion: { error in })

        DispatchQueue.main.asyncAfter(wallDeadline: DispatchWallTime.now() + 5) {
            provider.reportOutgoingCall(with: controller.callObserver.calls[0].uuid, connectedAt: nil)
        }
    }

    func providerDidReset(_ provider: CXProvider) {
    }

}
CallKit makes it easy to change ringtone, icon, call type (audio/video), whether or not the call appears in recents, and a few other features.
import UIKit
import CallKit

class ViewController: UIViewController, CXProviderDelegate {

    override func viewDidLoad() {
        let config = CXProviderConfiguration(localizedName: "My App")
        config.iconTemplateImageData = UIImagePNGRepresentation(UIImage(named: "pizza")!)
        config.ringtoneSound = "ringtone.caf"
        config.includesCallsInRecents = false;
        config.supportsVideo = true;
        let provider = CXProvider(configuration: config)
        provider.setDelegate(self, queue: nil)
        let update = CXCallUpdate()
        update.remoteHandle = CXHandle(type: .generic, value: "Pete Za")
        update.hasVideo = true
        provider.reportNewIncomingCall(with: UUID(), update: update, completion: { error in })
    }

    func providerDidReset(_ provider: CXProvider) {
    }

    func provider(_ provider: CXProvider, perform action: CXAnswerCallAction) {
        action.fulfill()
    }

    func provider(_ provider: CXProvider, perform action: CXEndCallAction) {
        action.fulfill()
    }

}
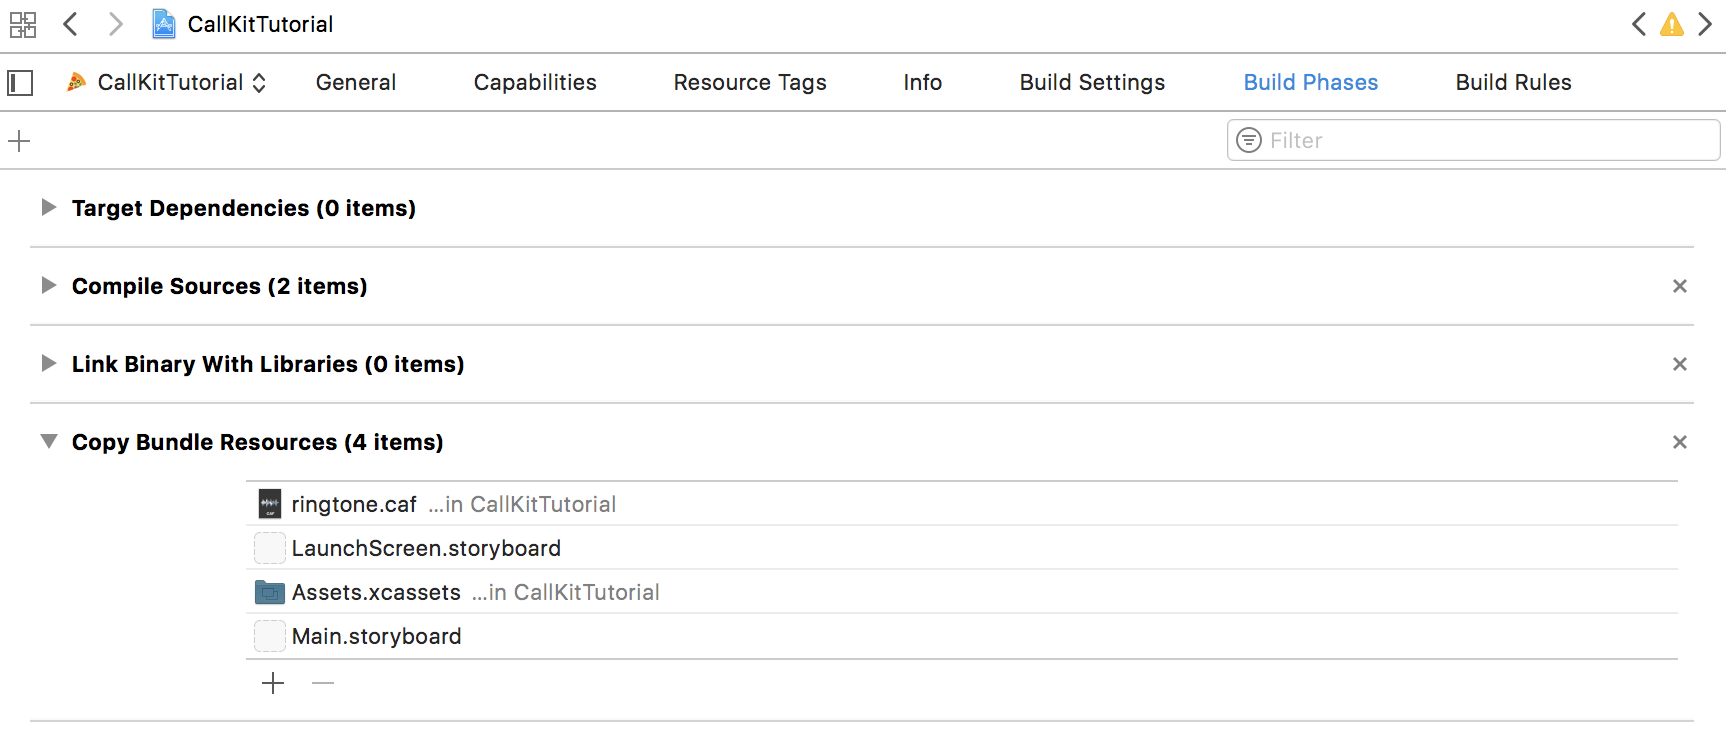
When you import your custom ringtone, make sure to Add to targets and add it to Copy Bundle Resources as shown below.

Your custom icon should be a 120x120 png file with transparency. Drag the file into the 3x box.

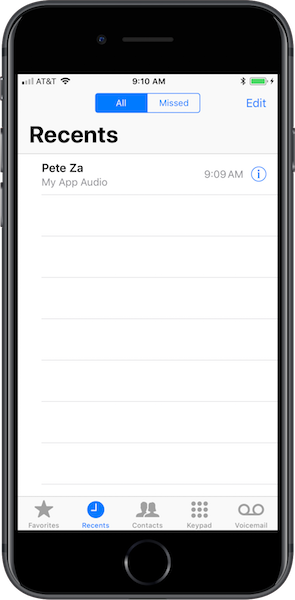
Run this code and when you go into Recents on your phone, you won't see the call in your history. The calls from the previous sections will be in history. The ability to control whether or not calls appear in Recents only works on iOS 11 and above.
Imagine the following scenario. Friend 1 opens up the app and presses call Friend 2. The problem is that Friend 2 force closed your video chat app a while ago. So the question is how can you trigger the CallKit UI when Friend 2 has his or her app closed. The way to implement this is with PushKit.
Replace the code in ViewController.swift with
import UIKit
import CallKit
import PushKit

class ViewController: UIViewController, CXProviderDelegate, PKPushRegistryDelegate {

    override func viewDidLoad() {
        let registry = PKPushRegistry(queue: nil)
        registry.delegate = self
        registry.desiredPushTypes = [PKPushType.voIP]
    }

    func providerDidReset(_ provider: CXProvider) {
    }

    func provider(_ provider: CXProvider, perform action: CXAnswerCallAction) {
        action.fulfill()
    }

    func provider(_ provider: CXProvider, perform action: CXEndCallAction) {
        action.fulfill()
    }

    func pushRegistry(_ registry: PKPushRegistry, didUpdate pushCredentials: PKPushCredentials, for type: PKPushType) {
        print(pushCredentials.token.map { String(format: "%02.2hhx", $0) }.joined())
    }

    func pushRegistry(_ registry: PKPushRegistry, didReceiveIncomingPushWith payload: PKPushPayload, for type: PKPushType, completion: @escaping () -> Void) {
        let config = CXProviderConfiguration(localizedName: "My App")
        config.iconTemplateImageData = UIImagePNGRepresentation(UIImage(named: "pizza")!)
        config.ringtoneSound = "ringtone.caf"
        config.includesCallsInRecents = false;
        config.supportsVideo = true;
        let provider = CXProvider(configuration: config)
        provider.setDelegate(self, queue: nil)
        let update = CXCallUpdate()
        update.remoteHandle = CXHandle(type: .generic, value: "Pete Za")
        update.hasVideo = true
        provider.reportNewIncomingCall(with: UUID(), update: update, completion: { error in })
    }

}
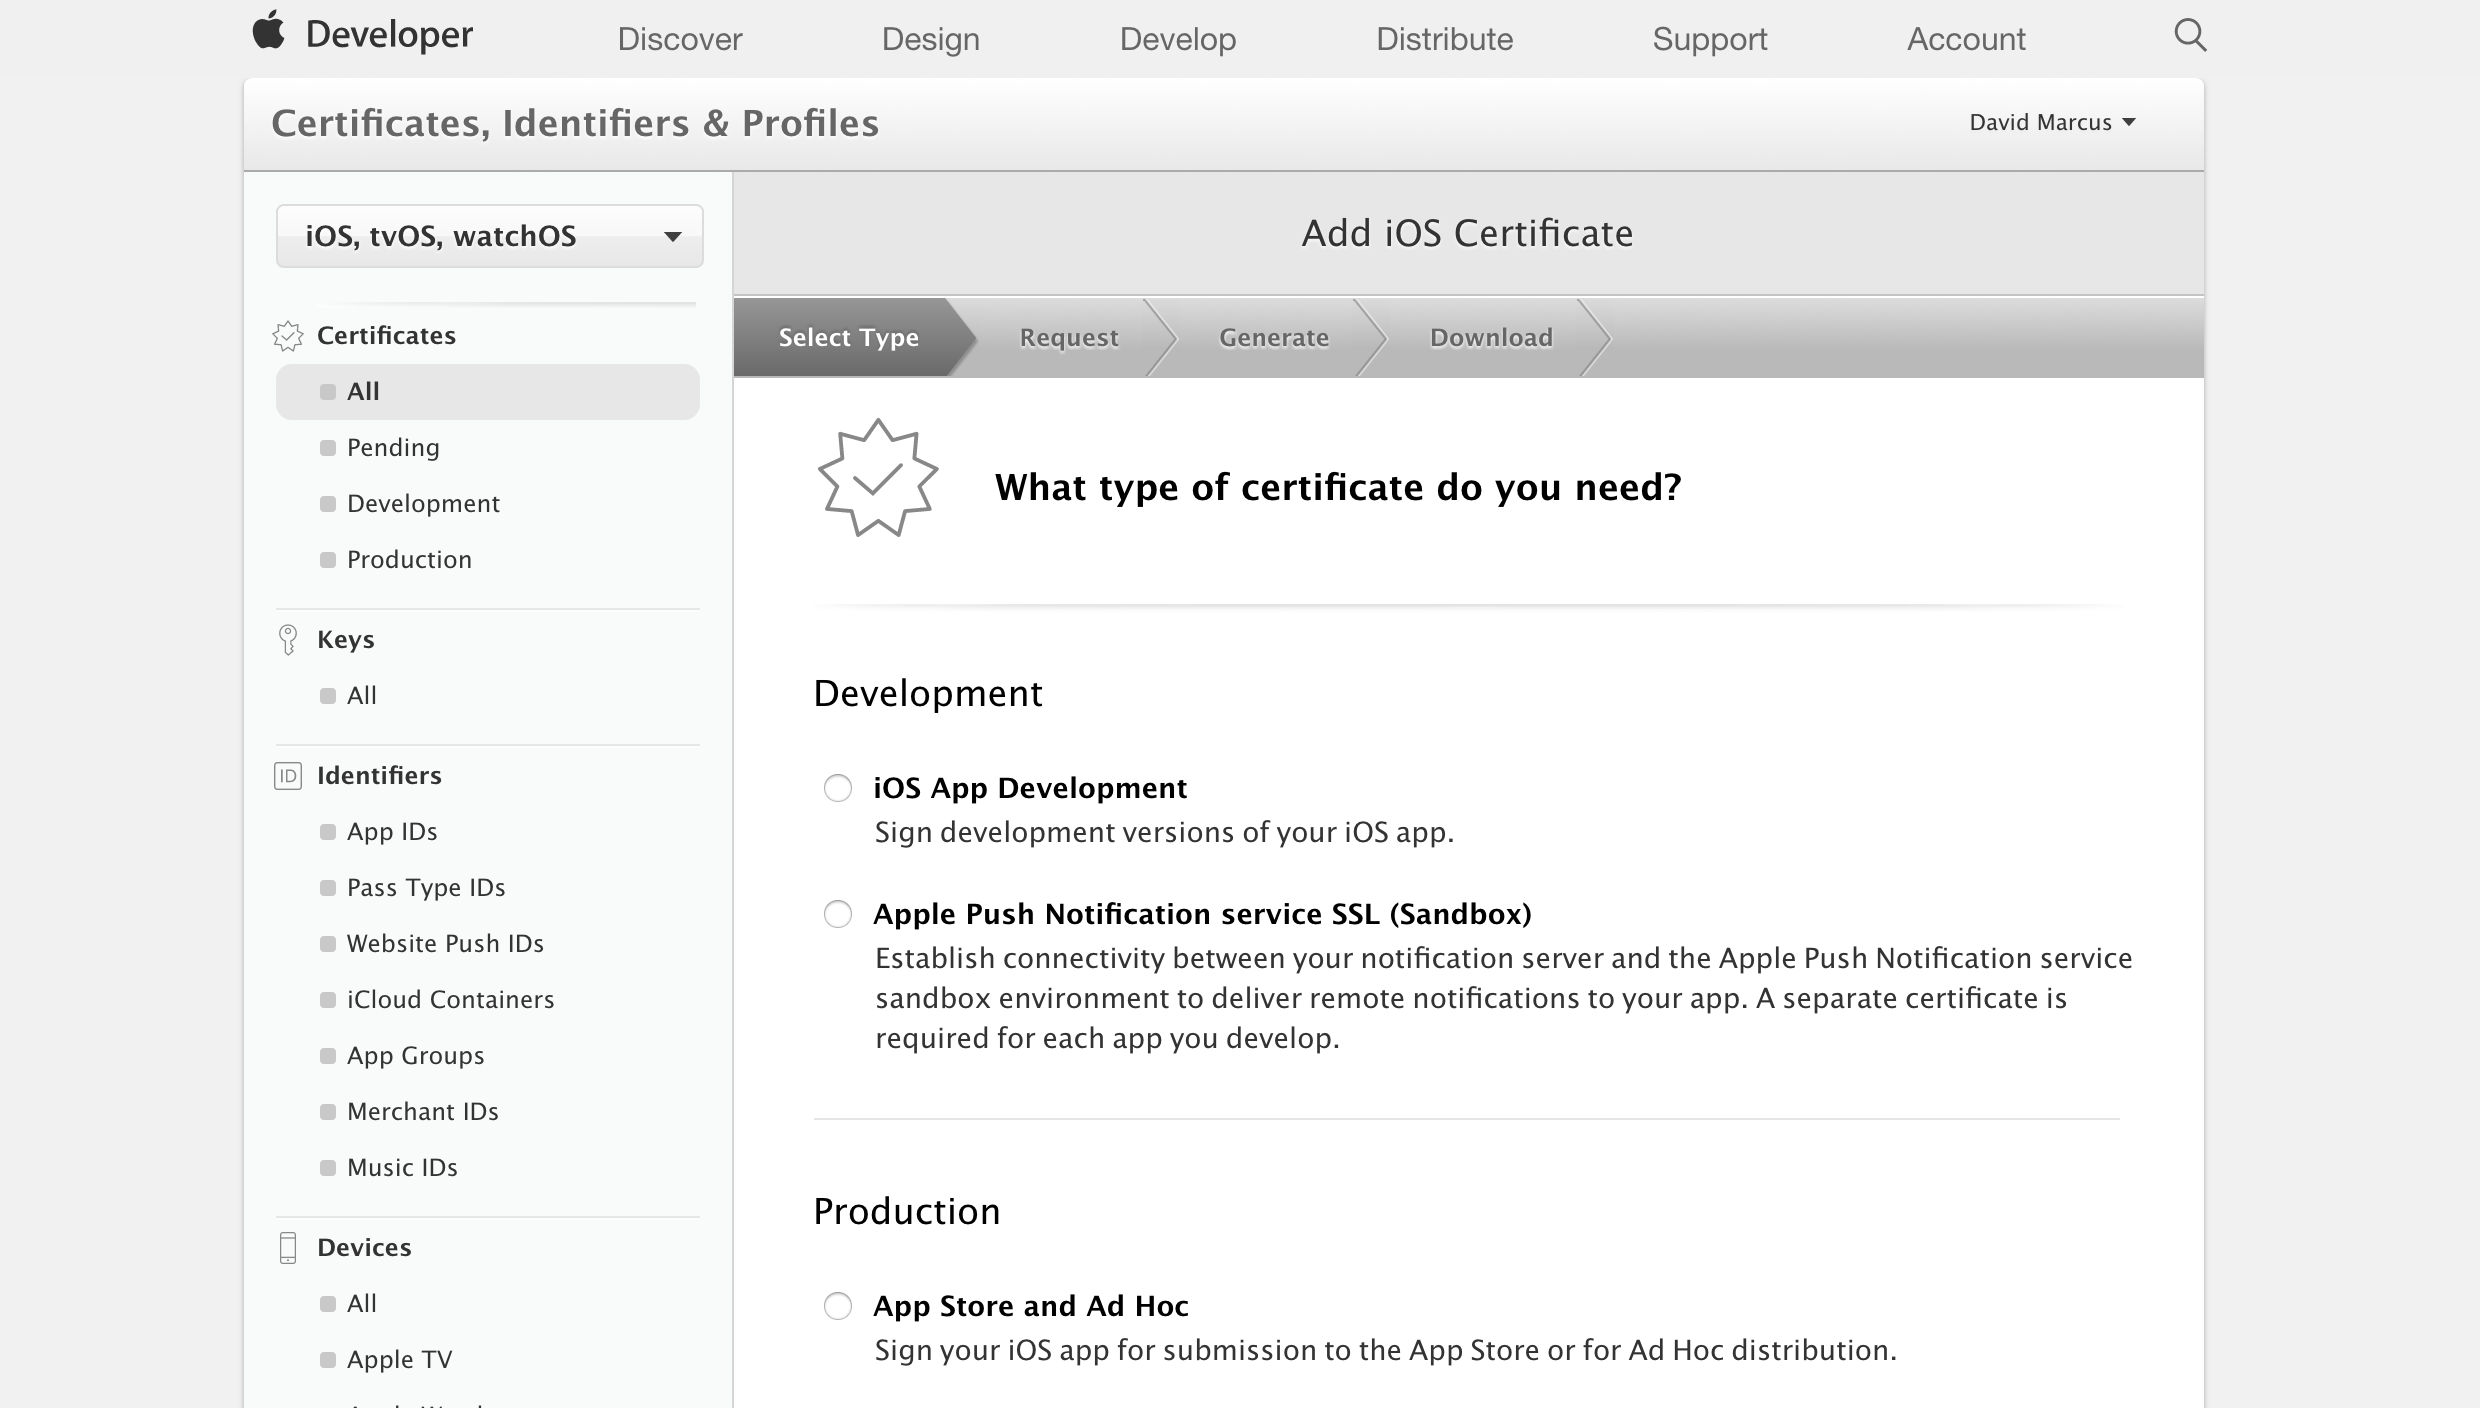
Go to the Apple Developer website, and login. Create an App ID, and make sure to specify the Bundle ID and check Push Notifications.

Create a new certificate and select VoIP Services Certificate.
Select your app and continue until you get to a screen the says Generate Your Certificate.

Open up Keychain Access and click Keychain Access followed by Certificate Assistant and then Request a Certificate From a Certificate Authority. Choose Saved to disk and save the .certSigningRequest file.

Go back to the Apple Developer site and click Choose File, and choose the .certSigningRequest from the previous step. Click continue and download the .cer file.
Double click on the .cer file.

Then right click on VoIP Services: com.dmarcus.CallKitTutorial. Yours will be different because you'll have a different Bundle ID. Click Export and save it as a .p12 file. Be sure to add a password.
Convert the .p12 file to a .pem file with openssl pkcs12 -in Certificates.p12 -out Certificates.pem
Go back to your Xcode project and turn on Push Notifications under Capabilities.

Run the Xcode project on your iPhone and take a look at the bottom of Xcode

Copy the Device Id which is 6a25342c9d1941c73b37c5c28f6788efe0f7a8e681ce440f15a8eb61e679cb63 in this case.
Finally paste this into Terminal, but replace 1234 with the password you set for you .pem file. Also make sure Certificates.pem is in the current directory. If not, you need change Certificates.pem to /Users/path/Certificates.pem. Please make sure that your version of curl allows for http2.
curl -v -d '{"aps":{"alert":"hello"}}' --http2 --cert Certificates.pem:1234 https://api.development.push.apple.com/3/device/6a25342c9d1941c73b37c5c28f6788efe0f7a8e681ce440f15a8eb61e679cb63
Once you press enter, your iPhone will start to ring and display the incoming call UI. You can even force quit out of the app, use the curl command from above, and it forces your app open (temporarily) with the incoming call UI.

Now you know how to use CallKit to make your VoIP (video chat/audio chat) apps feel more native. As always if you have any questions or comments, please leave them below.